About Me

My photo
JLynn has been in the Art, Craft & Jewelry industry for over 30 years ~ promoting creativity through Education and Media. As a published designer, JLynn is known for her colorful Art, Artisan Jewelry, Altered ART Wood Tiles. Online since 2004, a former eBay Power Seller, on Etsy, and Amazon. Family, Art, Nature and Kaleidoscopes are some of her inspirations

Thursday, June 16, 2011

Should I apologize or not?

I still love you all...just have been really busy...
Good Morning everyone...it's been a long while...and I'm thinking that maybe an apology for my absence is in order...but then again...I have been creating lots of new jewelry designs, lampwork beads, and of course the Wood Art Tiles.  So...maybe I will just leave it as "Sorry I was busy creating and didn't realize how much time had passed since I last posted on my blog - I have high hopes to do much better" ;) - well here's the quick catch-up with some fun photos!

May was extremely busy...not just with the business but personally too.  My son finished his Junior year in College, and my daughter who is a dancer performed at the Joyce Theater in NYC...as well as a few local ones.  So aside from business to-do's and dance things...I was also juggling Birthday and Anniversary milestones...and a few out of state Road Trips.  I love May but am always glad to have things slow back down to a normal speed with June!

So here's a quick catch-up...
  • In May - we all went to the "Melting Pot" for the first time...it's a 2 hour deal with all the dipping and cooking your meal LOL - and I have to say that my favorite part was the Cheese Fondue and Chocolate Fondue...pictured above :)
  • My Earrings "Gypsy Soul" were featured in the June edition of Bead Trends - and here they are:

The July Bead Trends edition will feature two designs of mine - a gorgeous necklace and a pretty amazing Bracelet - hope you like them once I am able to reveal them in a couple weeks!

WOW...so in May we also had a fabulous Photo Inspiration contest which resulted in me getting LOTS of ideas for new jewelry designs based on the actual photographs.  You can check out my album of the photos, Wood TILES I created - as well as "inspired by" jewelry designs here...just click on the photo to view the complete album on Facebook...
Decoupaging on Wood tiles is nothing new to me...I actually did a demonstration for TV on it ~10-15 years ago.  But I was inspired to create a special tile for a friend back in late February (Hope Tile)...
And from there it's all blossomed into new artwork...and I'm so enjoying creating the ART & PHOTO tiles that feature my fellow artisan's artwork, my own Watercolor artwork, as well as some very talented digital artisans too...here's some photo samplings.  Although I'm trying hard to get things listed...many times the tiles will be sold prior to ever getting on Etsy  or Artfire...so if you haven't liked our Facebook page yet, please do so...as that's where all the sneak peeks happen (and "Reserved Listing" sales too).  Look for new shapes, jewelry designs and some special new Watercolor art from me too...
1" double sided ART tiles 

J-Lynn's Watercolor ART 3/4" Tiles (scanned/digitized in miniature)

CUSTOM TILES for our professional Photographers
Copyright Amanda Cargill Austin
Look for our Photography Partner program rolling out at the end of June 

1 1/2" Tile Pendants (excellent for Filigree wrapping or your own design- drilling is free)

Elongated Hearts are making many people happy!
Available in 1" charm/dangle style (single or double sided), 1 1/2" and 2" as well
Chunky Hearts also available 

New...rectangular "Tag" Tiles - excellent for wrapping or drill holes to create your own design

Well I leave you with a few samples of jewelry and home decor pieces made with our tiles...keep checking in on Facebook to see the latest from J-Lynn and other Jewelry Designers using our ART Tiles :)
J-Lynn Watercolor and Jeff Dostalek Photo image featured on Tiles

J-Lynn's Watercolor ARTwork featured on tiles

Pink Rose Delight in Flight

New...Home Decor Danglers...for Car Mirrors, Hooks, Purses, Cabinet Knobs and more...


Friday, May 6, 2011

New Tutorial & Published Designs with Bead Trends


Hi everyone - so sorry for the lapse in posts...I've had a list of things to share but for some reason, the hours slip by, and I miss the opportunity to post - I'm attempting to change my ways and be more consistent.  So...let me begin this post by saying that May is one of my favorite months - it's not too cold or hot, and the flowers always look gorgeous and fresh!   These are a few shots from my front and backyard (close-up)...photography is another passion of mine too.


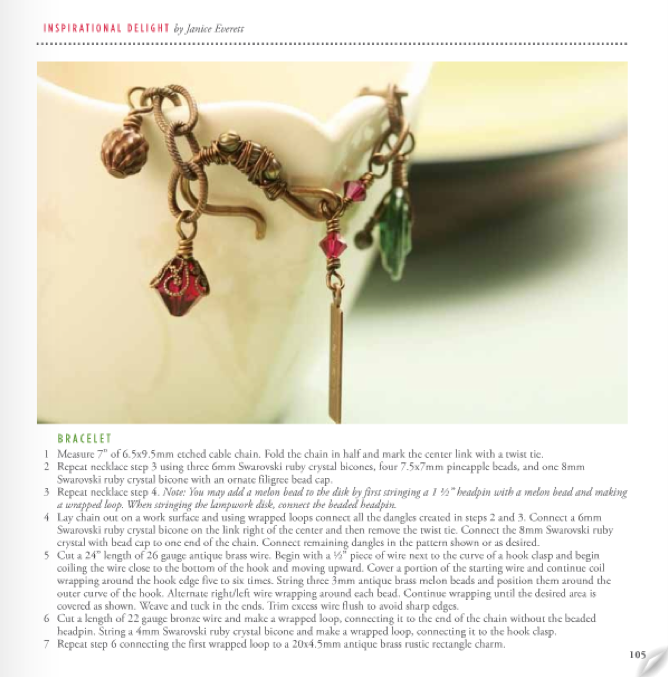
May is also an especially exciting one for me professionally...as it was my "debut" in the Bead Trends May publication (page photos below - and yes designs are available for special ordering).  The months have flown by since that November day when I submitted a handful of designs - but I'm really enjoying revisiting my Educational background through my published jewelry designs, as well as my Tutorials. 

The funny thing about this publication business... is that after successfully selling wholesale for quite a few years, it never crossed my mind to submit any of my designs.  But fate had a hand in that...and it all started with my browsing the Bead Trends Facebook page and seeing a post requesting fans to share their Holiday Earring designs.  So after a little "pep" talk...I posted my Crystal Snowmen Earrings.  Within a few hours, I was very surprised and excited to receive a super sweet email from one of the Editors at Bead Trends (Jeri), asking if I would consider doing a Tutorial for their Blog.  Since my background includes teaching arts, crafts & design - and having a lot of experience with graphics and professional presentations, I was really excited to provide one for their Blog.  And it was this first experience with Bead Trends' professionlism and friendliness, that had me submitting my jewelry designs for print publication just a week later, and the rest - as they say...is a growing history with an amazing group of people and high quality, caring Company.  It's been such a pleasure and very rewarding experience to share tips, techniques, ideas, and designs.  But the sweetest part of it all, is meeting so many people that share that creative passion - no matter what the art form.  Life is good :)

My latest Tutorial for Bead Trends Blog features Vintaj Natural Brass Filigree Leaves that have been treated with a combination of Acrylic paints and Tim Holtz Adirondack Alcohol Inks.  I LOVE working with any type of medium that allows me to have something in my hand :) - paintbrushes are a favorite!  Click on the picture to go to Bead Trends Blog...


Bead Trends publication...if you are unable to purchase this mini-booklet in your local book store...do yourself a favor and subscribe to Bead Trends ONLINE - it's full of many jewelry designs that will really inspire you to new levels in expressing your own creativity and unique style.  The photography is amazing too - here's a picture of the Bead Cover (featuring a talented fellow designer), and the pages featuring my jewelry designs.  Have a super Friday and have a wonderful Mother's Day!
~J-Lynn


Saturday, April 16, 2011

Tutorial - Mastering Wire Wrapped Loops


Earthy DROP EARRINGS
GIVE-AWAY - Earrings!
...Become a "follower" of our Blog - and you could win a pair of JLynnJewels earrings.  Winner will be chosen by Random.org on 5/17/11 at 11pm EST
Increase your chances...leave a comment below and you'll be entered twice!

Supplies:
2 - 4mm Bicone Swarovski Crystals (Indian Sapphire shown)
2—3mm Bicone Swarovski Crystals (Black Jet shown)
2—Czech 11x9mm Oval (Wasabi w/Picasso shown)
2—Czech 5x4 Rondelles (Emerald Wasabi shown)
2—Czech 5x6 Rondelles (Blue shown)
2—Fallen Angel 9mm Art Nouveau Bead Caps
4—Fallen Angel Star Flower 5.5mm Bead Caps
2—3” Fallen Angel Brass Headpins
Rosary & Bent Chain-Nose Pliers, Wire Cutters


INSTRUCTIONS:
No matter what level beader you are, this tutorial is geared to take you step-by-step with an easy approach to wire wrapping to give your basic drop earrings a clean, professional, finished look. These earrings are fun to create and can be created in a multitude of color combinations—be creative in your choices and also arranging your stack.


  1. Begin by stacking beads on Head pins.  Grasp the head pin just above beads with the tips of your rosary pliers. Gently bend the wire over the top of the pliers (pushing down and away from you) to make a 90 degree angle (side view shown). Note...The size of the top loop/circle is determined by the wire placement on the rosary pliers. To ensure your earrings have the same size top loop, be consistent with wire placement (tip...beginners can mark their pliers with a sharpie to line up their wire).
  2. Rotate your pliers a 1/4 turn to the top of wire (side view shown).
  3. Without shifting your pliers, shape the wire up and over the pliers ending with the wire pointing down.
  4. Reposition your pliers so they are in the opening, then shape the wire to complete a circle (which will be off-center until you complete the next step).

  5. Without releasing your grip on the pliers, rotate/turn your circle so that it is centered over the headpin and the end of the wire is angled up.   
  6. Press down on the end of the wire so that you once again have a 90 degree angle and perfect circle. (tip...create your 2nd earring and compare loop sizes prior to completing the finishing details).
  7. Place your Rosary pliers vertically across the top of your circle. Take your bent chain-nose pliers and grasp the tip of the wire then cross over the center of the headpin staying parallel to your rosary pliers.
  8. Continue winding the wire around the head pin taking the time and care to keep coils tight and precisely next to one another (reposition your bent chain-nose pliers after each side to side pass).
  9. Using a pair of side cutters, clip the excess wire on an angle (this will ensure you have a professional looking end).
  10. Using your Bent chain-nose pliers, press and tuck the end of the wire next to the last coil so there are no sharp edges. Open your ear wire sideways and slip on the stacked drop, then move the ear wire back in place


Designer variations...try any style oval bead, and coordinate your Czech Glass rondelles and Swarovski Crystals with them.. This particular style is shown with Fallen Angel Black Brass—but you can also create a similar design with Sterling Silver or Vintaj Brass Metal.

Note:  All images, jpgs, jewelry design, text are the property of JLYNNJEWELS and copyrighted/monitored. You are free to use this tutorial for your own personal use but it cannot be copied and redistributed without the consent of JLynnJewels in any form.

ENJOY!
Compliments of Janice Everett at:
http://www.JLynnJewels.com
http://www.artfire.com/users/JLynnJewels
http://www.Etsy.com/shop/JLynnJewels

Friday, April 8, 2011

DECOUPAGE DIY Tutorial Project & COLOR Intro

Good Morning...taking a few moments in between writing up instructions for magazines and jewelry designing - to post a couple things here.  Time is flying...!  Above are my own original Watercolors in miniature ART tiles (I scanned my original art pieces and worked hard cropping a variety of sections to create these tiny little masterpieces of art to utilize in jewelry making and other craft projects - another item in my NEW "Altered ART collection").  I have to say it's always a little nerveracking to put yourself out there in such a personal manner because "ART" is so subjective to opinions.  So I've been overwhelmed in a good way with all the positive responses I've been receiving and plan to share more of my Watercolor art with you - maybe even in digital format :).  I LOVE COLOR...can you tell?

Currently I'm working hard to get more DIY decorating and craft tips up here on the Blog - as well as on my Facebook Business Page..and my website.  In my "former" Corporate life - I worked Education, Marketing and Public Relations for Jo-Ann etc. (when they first rolled out the super stores in the late 90s).  Long story short - I had an amazing job, super people that I worked with - and was  paid to teach, share, demonstrate and promote all things that I love.  I write this with a smile on my face because they were magical times - and I was involved with the community, churches, schools, and a lot of businesses and groups that loved me in return.  I also had the pleasure of attending many events like the CHA conference in Chicago and was a regular on a local TV show in Nashville called the "Talk of the Town".  So...I don't think there is anything I haven't tried...and if I find I haven't, I soon will LOL - it's an addiction...anyone else have troubles with this type of addiction??  We can start our own little Support Group right here on my blog :)

DECOUPAGE...is a very OLD art that actually started in the 12th century (in China)...and then became extremely popular in the 17-18th Century Victorian times where they cut out a lot of delicate shapes and patterns and applied them to furniture and other decorative pieces.  The ebb of crafts comes and goes - and in my years (I'll be 48 this summer...) it's really impressive to see how fashion, colors, trends, and crafts make their rounds...again and again.

When I was a little girl...I remember "decoupaging" all sorts of things on bottle caps, glass bottles (even Milk bottles and mason jars - LOL) - and lots of wood pieces including popsicle sticks.  We'd use images from magazines or things we painted.  Elmers Glue was HUGE...!  But wow how the Art & Craft Companies improved things...and "evolved".  It makes your head spin - and what I like is that it never stops...there is always something new or something re-invented or re-visited that makes things easier - in addition to basically guaranteeing a successful outcome to your creative project.

My fascination with decoupage continued into my adult life...and when I was first married and starting out in my own place - I collected decorating magazines and did multiple "collages" on regular xerox paper and compiled them in a 3 ring binder.  I did this for decorating, floral arrangements (yes I do florals - live & silk) AND outdoor landscaping.  And yes...I still have the binders and still add "favorites"  - it's a nice thing to refer to or simply look at to get inspired.

SO...
If you are contemplating decoupage - go to your local craft store and purchase some simple things...a paper mache piece (could be a trinket box), some craft paint, Mod Podge Satin or Glossy, a sea sponge and some Foamy brushes.  That's it - low cost & reasonable.  You can purchase paper cut-outs at the store or use Greeting Cards, magazine cut-outs...but I really encourage you to take a little extra time and browse through the images available on http://www.etsy.com/ - simply do a search on "Digital Images" and you'll be amazed at what you'll find - if you like Roses - do a search on Rose Digital Images...  I've purchased 3x5 digital artwork to use in frames around the house...like this:


The nice thing is that they can be printed at home whenever and for whatever you want...maybe to decoupage a garbage basket...light cover...votive holder...cabinet...lampshade?
Mod Podge can be purchased in individual bottles or this nifty Starter pack (LOVE this)

DIY Decoupage Project:
Base Coat your Paper Mache piece using a foamy brush and Acrylic paint (Cream or White) - allow to dry.  Dampen your sea sponge and wring out - and on a piece of waxpaper, place another color of Acrylic paint.  Dab/pounce your sponge in it - then on a scrap paper pounce up and down so that the excess paint is blended into the sponge.  Now do the same pouncing motion on your paper mache piece.  Reload your sponge as needed (and make sure that you keep it damp so that the paint flows and blends) and complete sponging your entire surface - allow to dry.
  • Cut out your digital images with a sharp pair of scissors. Arrange your cutouts on the table to your satisfaction and take a digital photo you can refer to (if using multiple smaller pieces).
  • Since we are keeping things simple - we are going to use the same Mod Podge (e.g. Gloss) for attaching our images AND varnishing.  Using your foam brush - apply a coat to the backside of your cutout and place on your paper mache piece.  Use your fingers to press from the center outward so that your image is flat with no wrinkles or bumps due to excess glue.  More than likely you will have a little bit of Mod Podge around the edges - use your finger to blend in.  Complete applying all your paper cut-outs.  Allow to dry.  TIP:  Do not touch the surface of the paper too much with your fingers as you could remove the top layer of print - if you feel you must touch it, apply a thin coat of modge podge over the top once it's attached to your paper mache piece.
  • All that's left now is to seal and varnish it with Mod Podge.  That's right... we're keeping things simple.  Using your Foam brush...apply a medium even coat across the entire surface - taking care with your strokes (all in the same direction).  Once the top portion is dry - repeat for any lower sections.  If you'd like a more glossier look - apply another coat of Modge Podge.  TIP:  If your project has multiple paper images or a collage style...I like applying 2-3 coats of Glossy Mod Podge so that the pieces don't look like they've been cut-out and simply "glued" on.
  • Now - if you'd like to further embellish your paper mache "Box"...you can add ribbons, trims - and yes even my Altered Art Wood pieces or Vintaj Brass charms or Tags - check out my Artfire or Etsy Stores at JLynnJewels (see right side bar picture windows).


INTRO to COLOR:
If you don't have yourself one of these wheels - get yourself one!  They are just fun to play around with, and get inspired with warm and cool colors - as well as, getting familiar with Hues...Tints...Tones and Shades.  There are Primary Colors (Red, Yellow & Blue)...Secondary Colors (which is a combination of two Primary colors which create an Orange, Green or Violet).  Then you can get tricky...with Tertiary color combinations (and that's one Primary and one Secondary mixed together)....and if that sounds way too complicated for your liking - you can buy them premixed LOL!

Actually my favorite part on the wheel is shown in the picture above - you can move the wheel around to get a variety of unusual color combinations to play with.  If you look at the center you'll see that I have a Blue Green, Red Violet and Yellow Orange combination.  It just so happens that the Color Combo Group (on Facebook) that I participate in has similar colors for the challenge this week!  So I'll be creating some jewelry or painting something with this "Triad" of colors (Teal, Purple & Gold).  You can see some of my past jewelry designs created for this challenge in my JLYNN JEWELS COLOR COMBO CHALLENGE photo album

Well - that's it for today - look for more Tutorials, projects and DIY tips throughout the month.  Invite your friends - we're growing and would love to hear your thoughts, suggestions - and of course if you have any questions concerning decorating, jewelry, arts & crafts - don't be shy!  AND...if you haven't visited my Facebook Business page - come on over at J-Lynn Jewels - favorite us by pressing the "like" button and you'll be eligible for different give-aways (in March we gave away 4 pair of Custom Earrings).  Keep in touch and make sure to leave any comments/questions by clicking on the "comment" link below.

Happy TGIF and hope you all have a wonderful weekend!
~J-Lynn


Friday, April 1, 2011

Faux Painting on Brass Filigree Tutorial - YES you can!

Gorgeous Halo Pink/Violet/Gold Vintaj Brass Filigree
and
Fun Alcohol Ink Color Mixed Vintaj  Brass Teardrops
DIY Tutorial in 4 easy steps!

Today I'm going to share a little J-LYNN DIY Recipe with you...Faux Painting on Vintaj Brass Filigree pieces.  Here's the supply list:

SUPPLIES:
Brass Filigree pieces of your choice (examples shown are Vintaj Natural Brass Co.)
Acrylic Paint in White, Off-White, or Cream
Tim Holtz Adirondack Bright Alcohol Inks (your color choices)
Tim Holtz Adirondack Alcohol Blending Solution (for lightening ink colors and cleaning)
Lumiere Light Body Metallic Acrylic Paints (your color choices)
Script Liner Brush
Stencil Brush
foam dabbers
Varnish (your choice of finish...matte, satin or gloss)
Sponge Brush (for Varnishing)
Papertowels
Gloves
Waxpaper
Posterboard (for practicing)


Step 1:  Preparing the base surface on the Brass Filigree
Line your painting surface with waxpaper (best so your filigree doesn't stick or pick up pieces of newsprint).  Apply White or Cream Acrylic Base to the filigree pieces (front & back) with a Stencil Brush and using a pouncing technique (load brush, swirl around, then apply to filigree in an up & down patting motion).  Blot off excess paint with paper towel and allow to dry (~5-10 minutes).  If you would like a brighter look, apply a second coat.  Using a stencil brush versus a sponge or foam piece gives your piece more dimension because the paint will be stippled in between the filigree details.  Note:  If you are using antiqued pieces, they should be cleaned in warm, soapy water and allowed to dry (or use a brass cleaning polish such as MAAS) to remove any built up dirt or oils that have accumulated over the years.


Looking for a Shabby Chic look?  Look for our next tutorial on Antiquing & Crackling!


Step 2 - Adding base color to Teardrops & Chandelier Filigrees with either Adirondack Ink or Lumiere Metallic paint
Teardrops:  We used Adirondack Ranger Ink - apply ink to both sides of your Filigrees with a paint dabber, sponge or regular paint brush and dry.  Use one color as shown in the bottom two examples (purple and olive)...or use a combination of two color inks as shown in the top (green/gold).  In this example we used the ink straight from the bottle - however, if you would like to lighten the ink tones, mix a bit of Alcohol Blending Solution with your ink before applying.  Filigrees will have a somewhat "dark" appearance until we add the Lumiere highlights in Step 3. 
Teardrops shown with undiluted Adirondack Alcohol Ink

NOTE:  For Chandelier Filigree...we applied a base coat of Lumiere Metallic Acrylic paint to both sides.


Step 3 - Highlighting your Filigree pieces with Lumiere Metallic paints
In this example we used Halo Pink-Gold for our base, then using our Script Liner Paint Brush, and added touches of Halo Violet-Gold & Metallic Gold.  It's important to start with a damp paintbrush and only pick up a small amount of paint on the tip of your script liner.  Feather stroke the areas you'd like to highlight on the Filigree - using a very light hand (this is where practicing on a posterboard comes in handy - Feather strokes are like a barely touching sweep across the surface of the Filigree). 
Chandelier elements being highlighted with Script Liner and
Lumiere Metallic Gold (Halo Violet-Gold already applied)

Both Chandelier & Teardrops drying after being highlighted with Lumiere Metallic paints


Step 4 - Finishing Steps
It's best to seal your Filigree and give it a durable, protective finish.  Using a Wedge Foam Brush, load it with Interior Varnish (we used Gloss) and apply with long strokes across the Filigree surface.  Let dry approximately 10 minutes and add a second coat if desired.  We also varnish the back side as well.  Remove any bubbles or excess varnish in between filigree with your script liner brush.  Clean-up:  Acrylic paints are waterbased and will clean up warm soapy water or simply warm water.  Alcohol Inks should be cleaned using the Ranger Ink Alcohol Blending Solution and then warm, soapy water.
Closeup:  Teardrops  and Chandeliers highlighted with Lumiere Metallic paints
 and then finished with Glossy Varnish - VIBRANT and FUN!
 
Oh so CHIC and Beautiful...read to create into fabulous earrings, pendants
or possibly to decorate a lampshade of other home decor project.

Suppliers:
Your local craft stores should carry most supplies (Jo-Ann's, Michael's, Hobby Lobby, AC Moore).  Look for the economical 3-pack of Ranger Ink at Jo-Ann's.  For Vintaj Brass and other finished ART pieces, we hope you will consider shopping with us at our Etsy Supply store.  For Lumiere paints...try Stampington Company - it's one of my favorites for a lot of different craft items.  They carry Lumiere Metallic Paints (by Jacquard Products) and it's available in a variety pack for $14.95 - here's the product link:   http://www.stampington.com/html/lumiere_acrylic_paints.html

Vintaj Natural Brass Co. has an awesome website and blog - please take the time to check their products and idea gallery!

JLynnJewelrySupplies on Etsy:   http://www.etsy.com/people/JLynnJewelrySupplies 
(store link in right column too).  Here you will find quality jewelry supplies and our handcrafted ART accent design pieces:

If you don't see what you're looking for in Filigrees or any Vintaj natural Brass supplies, just convo us and we'd be happy to do a special order for you...we are a retail supplier of Vintaj products and are constantly updating the store with new products.

WE HOPE you enjoyed this J-Lynn DIY Recipe Tutorial for Faux Painting on Vintaj Brass Filigree pieces! 

LOOK for additional tutorials soon...if you have a special request, question, or product inquiry, please feel free to get contact us - we love to share and inspire you :)

Monday, March 21, 2011

Hope...and how inspiration takes flight in real life

Hope...sometimes that's all we have in life.
A hope that keeps us breathing, living, moving, and...
motivated to reach for that next promising day.

Thought I would share a true story with you...one that touched my heart and actually was one of the things that had me thinking of the special ways to express the word "hope" in my jewelry designs...what the word "hope" means at different points in our life...what it means for people going through trying times...and what it means to the special lady that I created this Altered Art wood piece and Necklace for... 

In this case - my inspiration was a typical, fun loving woman...one that had a lot going on in her life...one that worked...one that spent a lot of time with family.  And I learned from one of her friends…that one day last year, her world as she knew it, came to a stop...because she was diagnosed with Leukemia.  In a single heartstopping moment - all things changed and each day became a personal struggle.  But with wonderful family, friends, support group, and a team of terrific caregivers and Doctors…she was given some precious months to hope and treasure the memories before she earned her wings.  This necklace was given to her by my friend - as a special symbol of "Hope" and a talisman of sorts that she always carried with her for comfort. 

This is the part I love - how creative pieces are born - how inspiration can hit you quickly...and this is why creating jewelry has so much meaning - because you have the opportunity for creative expression for all your emotions.  Not all jewelry inspirations start with a person or story...sometimes it's as simple as a snapshot, a word, Mother Nature, an animal...a flower...a piece of fabric or painting - but no matter what...the findings, focals and details of a piece are all intertwined together with lots of heart-felt emotions which truly make them special, unique, highly personal and original.

You know I'm going to be 48 this year - not young anymore...but not too old LOL - and during the last 35-40 years some of my best memories have been spent sharing art and craft techniques.  Yes - even at the tender age of 8...I was sketching and helping others to express themselves through art.  Sometimes we are blessed to be part of a group that understands who we are and allows us to move forward - and that happened to me in the summer of 1998 when I was a part of Jo-Ann's (the sewing and craft giant) newly formed ETC superstores.  I had the privilege of being named Marketing, Community & Education Coordinator/Manager and had a feature article in the local Tennessean paper.  Aside from background history on me...the articles touched upon all that was trendy in the late 90s, ideas on how to take your craft to the next step...and how so many of the arts and crafts - are actually things that have been going strong for centuries (like "Decoupage" - which actually started in the 12th century...and became extremely popular in the 18th century/Victorian era).  Are you perhaps wondering where Scrapbooking gets its origins from?

This beautiful votive holder was created well over 15 years ago...it was decoupaged on the INSIDE of the glass with a pretty paper napkin with specialized flame resistant adhesive...and then decorated with glass dimensional paint.


My new wood "Altered Art" wood pieces are a combination of fine art techniques, faux finishing, detailed/layered decoupage created with artwork and specialized paper (including my own original watercolor and graphic art digitally reproduced with a scanner).  They can be used in jewelry, or as accents on frames, mosaics, made into magnets and lots more.  Here's a few examples of my finished wood pieces, followed by a couple original watercolors that will be manipulated and cropped into a variety of backgrounds and images to be used in my jewelry creations - modern technology is very cool!

The Hope & Wish pieces are wrapped with Vintaj Natural Brass Filigrees
Muted Fruit Bowl
Spring blossoms - when the trees are still bare but the evidence is before our eyes :)

Gentle reminders...a couple of my framed desktop original watercolors

Did you know?...
The word "decoupage" is French and means to "cut out" or "cut up" - and is the art of decorating an object by gluing colored paper cutouts onto it.  This is a timeless art and craft from the 12th century...and became famous in the 18th century in Italy. 

Now...back in the 70s and into the early 80s...I remember decoupaging bottle caps, bottles, candles, popsicle sticks, lots of wood pieces, frames, and all with Elmer's Glue LOL.  Today we are extremely fortunate to have such a variety of adhesives including a craft favorite "Modge Podge" (availabe in a variety of finishes such as matte, satin and gloss) which allow most people interested in creating, the opportunity to decoupage in a craft friendly, non-toxic, easy way.  On the other end of the spectrum...and for those that are wanting to add more elements to their creations...the sky is the limit...and you can utilize any fine art materials such as special paints and effects, embellishments, different papers, alcohol inks (and you can blend these with some adhesives too...), as well as, things like gold leaf, crystal flatbacks ...all of which work well with the professional grade glues, dimensional adhesives, and resins that dry crystal clear.

Signing off with a thought...and thinking back to the past...and remembering those 18th century Artisans.  I can only imagine they "HOPE"d their craft would continue to be passed down through the generations.  But looking at history...I wonder if they realize just how successful it has been :) Happy Creating!

Next week...look for some of my free decoupage projects and free jpg images you can download for your own personal use for home decorating, or creating gifts.
~J-Lynn

Thursday, March 17, 2011

Happy St. Patrick's Day!

Happy St. Patrick's Day everyone - I've been having a typical Irish day and have felt lucky all day and hoping that my luck continues and that I'm randomely chosen to be one of the designers in this Design Challenge from one of my Wholesale Suppliers, Rings & Things :) - lots of shiny Copper pieces! 
Take our design challenge!

Monday, March 14, 2011

HOPE...the passage of time...Spring Sale & Give-Away!


Well foremost on my mind is my heartfelt sympathy for all the people in Japan.  No words can really express my disbelief as I've watched countless videos of the destruction & devastation. Cities can be rebuilt...but the sheer number of lives lost...it's just so sad and heartbreaking.  It makes me especially thankful for everything in my life and how lucky so many of us are that we're alive, watching the clock tick, seeing a sunrise and sunset in normal settings.  So count your blessings, say some prayers, offer up thoughts of hope and make some wishes.

HOPE...and WISH....
The picture above shows two of my latest creations and will be transformed into some meaningful jewelry designs.  They were created in a new Altered Art/Scrapbook style which are handpainted with a special pearlized watered down paint in order to achieve multi-hued blending with simple faux painting techniques.   The muted, mottled, and patterned backgrounds are created with digital printouts (along with my own original watercolor artwork)...after which, "words" are flame burnt around the edges and layered on top.  The piece is then varnished, crackled, antiqued, and varnished again.  A lot of time consuming steps are involved in creating them...but they are so dimensional and make a big WOW impact in person.  Look for a variety of these wooden pieces in my 2011 jewelry designs (pendants, necklaces, bracelets and some smaller style earrings), and also in our Supply store where they can be purchased from $8-12 depending on size.  Here are some others in various stages of finishing...


And if you love Vintaj - check out our NEWEST additions featuring Vintaj Natural antiqued brass.  These are also created with art-style digital prints as well as my own Watercolor paintings.   These will retail at $5.50 - 10.00 depending on size.


Well - I'm signing off with one last thought...what would life be like if we didn't have any daylight savings time changes?  I'm not sure.  But after the latest "Springing Ahead" which caused a lost hour of sleep and deep confusion in my brain...I'm beginning to realize why Fall is my favorite time of the year LOL (because we FALL BACK and regain that lost hour of sleep)!

Don't miss your last chance to SPRING AHEAD to our SALE & Give-Away...All good  things must come to an end...so fair warning - our 40% off sale at our Etsy and Artfire stores will be ending on 3/21/11.

Etsy:  SPRINGTIME40 (promotional coupon code - enter at checkout)
ARTFIRE:  prices reflect sale (no code necessary)

MARCH GIVE-AWAY CONTEST:
Simply post a comment here on our blog and/or be an official personal Facebook Follower (J-Lynn Jewels) and you could win your choice of Earrings from our Springtime Contest Album http://www.facebook.com/album.php?aid=277981&id=135485981953

Next WINNER will be chosen on St. Patrick's Day 3/17/11
Have a great evening :)
~J-Lynn

Tuesday, March 8, 2011

Mardi-Gras Fun!

Figured I'd let you have a glimpse of our crazy household today...and to be honest I'm not sure why - and I'm equally not sure how I missed the Mardi-Gras pre-celebration this past weekend either as I'm usually on top of things that are cause for an impromptu celebration!  However - today it's official...I didn't miss a thing - it's Mardi-Gras AND FAT TUESDAY :) - as if I need a reason to eat something rich and full of calories?  Especially with St. Patrick's Day next week?  And especially since my daughter works in our local Shoprite Bakery and talked me into purchasing a loaf of this amazing Fresh Baked Soda Bread AND the imported Irish Butter to go along with it???  Yes - I do think I'm at least partially prepared for this fine Fat Tuesday Day LOL!  But I'm going to need to take time to prepare some more things...

YUMMY!

Party-Gras...yes I'm also visually prepared because I LOVE colorful glass...this picture shows just one of my collections of mini-vases on a window ledge and although you can't see them - there is also Hand blown glass ornaments (the big Friendship style balls) hanging in each window and a variety of stained glass pieces in the windows.  And of course who doesn't need a little Red Tinsel Shaker in their lives???


"Baby you're a FIREWORK"
Our Red Shaker has gotten a lot of mileage (my daughter who will be 17 soon and dances competitively was given this at a recent dance competition - the dance show sponsors were throwing these up high to Katy Perry's Firework song)...my husband and I have a lot of fun taking turns shaking this while singing the Fireworks song REALLY LOUD - our best rendition was the morning after the competition when she just came down the steps after waking up ;)!  And we are still contemplating taking it with us to the grocery store where she works and singing really loud there too.  We are a tad crazy...but like to have fun!

Well - time is ticking (pun intended)...so I'm going to leave you with another colorful visual...my Furnace Bead Dangle charm style Watch :)

Well - I'm off to get some fun jewelry pieces created and possibly play with a little fire (as in torching lampwork beads in my studio) - wishing everyone a FUN and colorful day AND no matter what your age...take 3 minutes of your time and listen to "Dancing in the Streets" with my boys Mick & David from 1985 - and just so you know...that's the year I graduated from College LOL...I'm starting to feel very vintage in a good way :)

Have a good Dancing in the Streets type of Mardi-Gras day!
~J-Lynn

Thursday, March 3, 2011

The Lion & the Lamb...March?

Well - we've always heard that March comes in like a Lion and goes out like a lamb...we started off with rain, then beautiful blue skies and sunshine yesterday with warmer weather - and today a little overcast and back down in the mid-30's - brrrrr.  This Lioness must be very temperamental LOL!

January and February flew by for me...and at the end of January I took a snow shovel to the head which required 4 stitches - my family would say it knocked some sense into me LOL!  Well between healing from that, getting some sort of bug, needing a molar pulled, dance functions with my daughter and Taxes...you probably understand why it flew by!  At any rate I have a new energy for March - and I'm looking forward to getting back into the swing of everything (just not shovels...)!

Here's one of our new designs featuring beautiful beach glass from Puerto Rico.  This design was inspired by many summers at the New Jersey shore (yes I'm a Jersey Girl...but haven't lived there in MANY years) - see the photo below the bracelet - you'll see lots of illuminating colors at a beautiful sunset in August which was my inspiration for this piece :)


We are growing both our JLynnJewels Facebook Fan page AND attempting to do the same on our new Blog here!  We know by our behind the scenes numbers we have a lot of readers that are checking in - but it would be great to see you as an official follower (16 looks a little pathetic don't you think?)....and to bribe you into doing just that...we will be doing a lot of Freebie Give-aways during the month of March!

March 7th - FAN day (one winner from our Facebook official Fan List)
March 17th - IRISH LUCK (winner from FB Fans/Blog Followers)
March 21st - SPRING AHEAD (winner from FB Fans/Blog Followers)

AND on April 1st...
one BLOG FOLLOWER will get their choice of Earrings from the March Give-Away Album.  To be eligible for this drawing, you must be an official JLynnJewels Blog "Follower".  For each comment you post, your name will be entered into our drawing - so the more you post - the better your chances :)

Well - here's my Irish Good Luck Wish going out to all of you...and here's hoping that March definitely goes out like a tame, loveable, little white Lamb!
~J-Lynn

Tuesday, March 1, 2011

Need a good laugh? Watch this one!

So I'm listening to Inside Edition tonight while I'm working on the computer and got giggling myself when I heard this...a baby laughing hysterically at something simple - ripping paper! Hope it bring a little laughter in your life tonight :)